House fires do not end when the flames are out. The real work begins in the gray hours that follow, when soot settles, odors sink in, and water from suppression starts quietly wicking into cavities. Recovery is possible, but it is not a single task. It is a sequence, each move setting up the next, with timing that matters more than most people realize. What follows is a practical guide based on field experience restoring homes after everything from small stovetop flare-ups to multi-room structural fires.
What fire and smoke actually do to a house
Fire damage gets the headlines, yet smoke and heat often do more long-term harm. Soot particles are microscopic and acidic. They etch chrome in hours, pit aluminum, stain painted surfaces, and bond with plastics in a way that defies casual cleaning. Protein-based smoke from kitchen fires is nearly invisible, but it leaves a sticky film with a sweet, pungent odor that migrates far beyond the fire room. Heat can delaminate veneers, blister laminates, and distort vinyl windows even when the flames never touched them. Then there is water. A single residential fire can leave a few hundred gallons in floors, drywall, insulation, and joist bays. Left unchecked, that moisture invites mold in as little as 48 to 72 hours, and swelling can ruin hardwoods within a day.
Understanding these mechanisms guides the order of operations. If you wipe soot with the wrong detergent, you set the stain. If you deodorize before you remove char, you mask odors, then they come back. If you reconstruct while wood still holds a smell, heat from a sunny day can release it again. The process must be disciplined.
Safety, utilities, and stabilization
Before anyone starts cleaning, stabilize the scene. Structural integrity comes first. Look for sagging ceilings from water-laden drywall, charred joists, and cracked masonry in fireplaces or chimneys. Secure the site against weather with tarps on compromised roofs and against entry with board-ups at broken windows or doors. Electrical panels often take a beating from heat and water, so bring in an electrician to isolate affected circuits or de-energize the building if there is any doubt. Gas service should be shut off until piping and appliances are inspected. Fire departments often do the initial utility shutdown, but restoration crews confirm and document the status.
Personal protective equipment is not optional. Even a kitchen fire can leave airborne irritants. Filtration masks, gloves, and eye protection protect you from soot, fiberglass, and the occasional exposed fastener sticking out of charred framing. Air movers should never run before soot capture, because they can distribute contamination. The early hours reward restraint and a careful sequence.
Documentation and the insurance path
Thorough documentation sets the tone for the entire project. Photograph every room from multiple angles before and during work. Focus on high-value items, but do not forget closets, laundry rooms, and the inside of cabinets. Cataloging contents can feel tedious while smoke still hangs in the air, yet it simplifies the claim and reduces disputes months later. On structural elements, measure and note the depth of char on framing members. An inspector will often accept a plan to shave an eighth to a quarter inch off joists or studs to remove char, but that decision needs photos and measurements attached to it.
Adjusters have different workflows. Some authorize emergency services right away, others require an estimate. Expect a conceptual range first, then a formal scope after demolition reveals hidden damage. Manage your own expectations. Even with a responsive insurer, a full-gut kitchen rebuild after a fire can run 8 to 16 weeks, longer if custom millwork or specialty appliances are involved. If the fire was in a bathroom, those timelines apply too, not far from a complete bathroom remodel timeline.
Step 1: Emergency mitigation - water extraction and drying
If firefighters used water, extraction and drying begin as soon as it is safe to enter. Pull standing water from floors, then remove wet carpets and pads that cannot be salvaged. Hardwoods complicate the scene. We have saved planks where cupping was less than 1/8 inch by setting up panel extraction and negative-pressure mats with steady dehumidification, but once boards crown or separate, replacement is often more sensible. The article on how to protect hardwood floors from water damage applies here. Protect unaffected areas with plastic barriers and floor protection to avoid cross-contamination.
Drywall behaves differently. When water runs down walls, capillary action wicks it up. A moisture meter will show readings 12 to 24 inches from the floor even when the visible damage is lower. In those cases, a controlled flood cut at the appropriate height allows wet insulation to come out and cavity air to flow. Dehumidifiers and air movers come next, but only after soot capture in the work zone so you are not spreading particles.
Step 2: Soot and residue identification
Not all smoke is equal. Dry soot from natural materials like wood and paper wipes differently than oily soot from plastics and petroleum-based items. Protein residues from cooking are their own challenge, almost invisible but strong-smelling. Run simple field tests. A white cloth gently rubbed on a surface will tell you whether you are dealing with dry powder, greasy film, or a mix. If it smears, dry sponges will do little until the right detergent breaks the bond. If it powders, chemical sponges are effective as a first pass.
Metals need attention right away. Bathroom fixtures, kitchen appliances, and polished door hardware can etch in hours. A quick neutralizing wipe with a mild alkaline cleaner reduces acute damage. For electronics, resist the urge to power anything on. The combination of soot and moisture is conductive. Vendors that specialize in electronics cleaning can often save a smoke-affected television or amplifier, but once energized, contaminants can short components and complicate recovery.
Step 3: Source removal - the single most important act
The fastest way to permanently deodorize a home is to remove odor sources. That sounds obvious, but it is easy to get distracted by a promising cleaning product or an ozone machine. Cut out charred wood, blistered laminate, melted plastics, and any porous material in the direct fire path. Insulation above a kitchen fire loves to hold odor, and it almost always needs to go. Open cavities to expose dimensional lumber. If charring is superficial, abrasion with a planing head or sanding can remove the damaged layer. Anything beyond a quarter inch into a stud or joist typically triggers replacement, or a structural engineer’s reinforcement plan.
We rarely keep drywall from https://www.reviverenovations.com/ a fire room. Even if it looks intact, the paper facing and gypsum core can hold odors and fine smoke. Score it, remove it in controlled sections, and bag it for disposal to minimize spreading soot to unaffected parts of the house. Floors under appliances that caught fire often show scorching. Ceramic tile may have survived aesthetically, but the smoke can infiltrate grout. Regrouting sometimes solves the odor. When it does not, tile removal with subfloor inspection is the only honest path.
Step 4: Cleaning strategies that work
With char and obviously damaged contents gone, systematic cleaning begins. We start top down, outside to inside. Ceilings get dry-sponge passes first to lift loose soot without wetting, which can set stains. Then we apply the least aggressive wet clean that lifts the residue. A mild alkaline solution, followed by a rinse, then a final wipe with a solvent cleaner on stubborn spots. Glossy and semi-gloss paint tolerate more agitation; flat paint often smears and may need sealing instead of over-cleaning.
Cabinet interiors and closet shelving trap odors. If they are structurally sound and worth saving, a careful regimen of degreaser, rinse, and odor-seal primer can avoid replacement. Where cooking fires are involved, protein residue behind the range hood is notorious. Even when the kitchen looks fine, the fine film may run into ductwork. We remove and clean ducts or replace them if accessible. Light fixtures collect soot inside the canopies; we disassemble and clean or replace shades and diffusers as needed.
Upholstered furniture is an honest litmus test. If upholstery was in the same room as the fire, aggressive cleaning can reduce odor, but a heavy smoke event usually warrants professional textile restoration or replacement. Area rugs have better odds if they were not singed. Quick delivery to a wash plant that handles soot extraction makes a difference.
Step 5: Odor control with purpose
Odor control comes after removal and cleaning, not before. Otherwise, you are deodorizing the wrong thing. Once surfaces are clean and cavities are open, we move to active odor treatments. Thermal fogging replicates the way smoke moved, carrying deodorant particles into cracks and crevices. It requires full PPE and a structured re-entry, and it works best when followed by a period of ventilation. Ozone can be effective in unoccupied spaces, but it is not safe for people, pets, or plants. Hydroxyl generators run in occupied spaces and do not bleach fabrics, but they take longer and demand patience.
Sealants are the final odor barrier, not a shortcut. An odor-sealing primer on framing, subfloors, and sheathing locks in any residual molecules. It is critical to pick the right product. Oil-based sealers still set the benchmark on stubborn odors, yet low-VOC shellac formulations can help in sensitive environments. We avoid over-sealing when it is unnecessary. More is not better; the right coverage is.
Step 6: Drying verification and mold prevention
Even when the fire looked contained, hidden moisture can linger. We run moisture mapping with pin and pinless meters across studs, sill plates, and sheathing. Numbers matter: dry framing typically sits near 10 to 14 percent moisture content, depending on the season and region. Anything above 16 to 18 percent requires continued dehumidification. Mold does not care that the fire is over. It will colonize paper-faced drywall, OSB, and framing if you give it humidity and time. If a bathroom was affected by fire suppression, remember the lessons from bathroom ventilation: vent fans should be checked or upgraded during rebuilds to prevent future moisture issues.
Step 7: Structural repairs and the art of rebuild
Once the space is clean, dry, and odor-free, rebuild begins. Scope depends on the fire. In a kitchen, you might be deciding between cabinet painting vs. replacement if doors and boxes survived away from the heat, or full replacement if the boxes took smoke and water. In some homes, cabinet refacing saves money without sacrificing style, but fire contamination changes the calculus. Particleboard boxes that swelled or took on odor seldom justify saving. Solid hardwood boxes give better odds.
Countertops have their own recovery dynamics. Natural stone like granite can usually be cleaned and re-sealed, though heat may have cracked it near a cooktop. Laminate and some synthetics can delaminate. If replacement is on the table, this can be a chance to align with long-term plans. Homeowners ask about Thinscape countertops as a modern alternative to traditional stone. They are thin, durable, and help keep weight down on older cabinets, but their heat tolerance depends on the specific product. Balance performance with the project’s scope and budget.
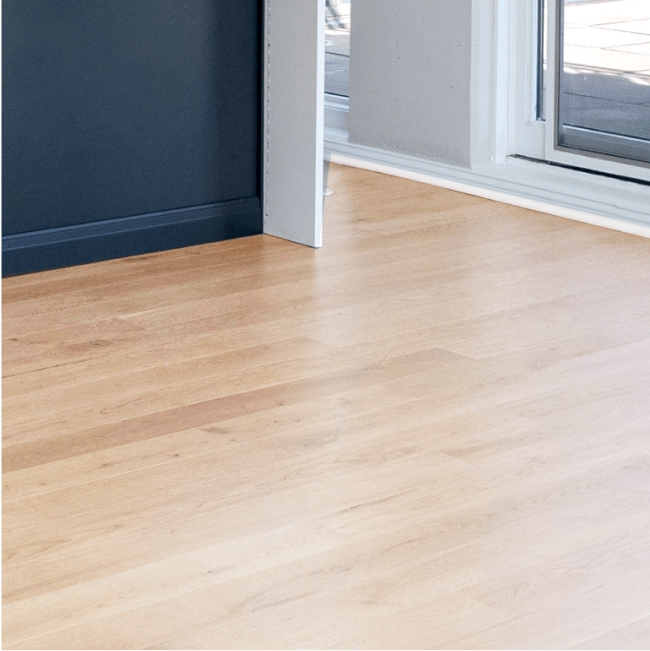
Flooring choices during repair should reflect durability and moisture resistance. Tile remains a stalwart for kitchens and baths, with grout sealing critical for long-term odor control. Luxury vinyl plank is often compared to hardwood on cost and durability, and in fire rebuilds it can make sense in secondary spaces given its moisture resilience. When replacing hardwoods, we match species and width to adjacent rooms if possible. Refinishing transitions helps blend old and new, and it may be the moment to consider the benefits of professional hardwood floor maintenance to extend life.
Lighting and electrical updates come with rebuilds. Smoke can corrode contact surfaces in switches and outlets. We replace devices in affected zones rather than gambling on intermittent failures later. This is also a sensible time for small upgrades, from GFCI placement to improved kitchen lighting design. Fresh paint after fire work demands the right finish. In kitchens and baths, semi-gloss or satin makes future cleaning easier and resists humidity.
When Revive 360 Renovations steps in on day one
On a late autumn afternoon, a client called after a stovetop flare-up turned into a kitchen fire. Flames never reached the ceiling joists, but the protein smoke found every surface, including behind picture frames down the hall. Our team from Revive 360 Renovations arrived the same day. We set containment at the kitchen doorway and the HVAC return to stop soot migration. The gas line to the range was shut and tagged for inspection. The homeowners wanted to save their existing cabinetry if possible. A careful look showed the face frames had no structural damage, but the boxes near the range had absorbed odor and moisture. We laid out options: attempt a deep clean and shellac seal on all interior cabinet surfaces, or replace the run around the range with new boxes and match species and stain on doors across the room.
We tested a small area with a cleaning and sealing combo to validate whether odor would persist when warmed. After a day with a heat lamp, the panel still released a faint smell. In that case, we recommended a hybrid plan. Replace the damaged run, clean and re-seal the rest, and use a thorough duct cleaning because the under-cabinet hood had pulled smoke into the short exterior run. The homeowners appreciated the rationale, and the final result avoided a full gut. That judgment often separates a home that still holds a hint of last year’s fire from one that feels truly new.
Estimating timelines without wishful thinking
People ask how long a fire restoration takes. The honest answer depends on whether we are drying, cleaning, and sealing, or demolishing and reconstructing. Emergency mitigation is one to three days in a typical residence. Drying can be three to seven days in cooler, dry weather, longer in humid seasons. Cleaning and odor treatments run from a few days to a week for moderate events. Rebuild timelines vary widely. A straightforward kitchen with stock cabinets might be four to six weeks. Custom cabinetry pushes it to eight to twelve. If you planned a remodel for later, a fire forces decisions. Borrow thinking from how to plan a kitchen remodel while living in your home. Set up a temporary kitchen space, stage meals around the work, and keep an eye on storage solutions for small spaces that make daily life bearable.
Contents restoration and what is really salvageable
Restoration firms can do impressive work with textiles, electronics, and hard goods. Still, set realistic expectations. Books with soot at the edges can be vacuumed and ozone-treated, but water-warped volumes seldom recover. Clothing responds well to specialized laundering, especially with protein smoke, but some delicate items never quite lose the scent. Wood furniture often survives with strip, sand, and refinish, and that may dovetail with a broader plan for wood furniture painting if you were already considering a change.
Kitchen contents are sensitive. Plastic mixing bowls hold odor. Silicone utensils are sponges. Stainless steel pans usually clean to like-new. Knife handles in composites can hold a smell at the junction. For dry goods, there is no hedging. Anything exposed to smoke goes. Sealed cans and jars may be salvageable after thorough cleaning of the exterior, but err on the side of caution.
Why sequencing matters more than tools
Tools do not fix sequencing mistakes. Run ozone before source removal and you end up masking. Start air movers before capturing soot and you spread contamination into clean rooms. Paint over char and the odor returns on the first hot day. The best restorations feel unhurried even when they move fast because the order is right. Capture, remove, clean, deodorize, dry to target, then rebuild. Deviate, and you pay in callbacks or lingering smells.
A focused checklist you can use in the first 48 hours
- Photograph every space before moving items, including inside cabinets and closets. Stabilize utilities, then set up containment before running any fans. Prioritize water extraction and initial drying in parallel with soot capture. Protect metal finishes with a quick neutralizing wipe to limit etching. Remove char and obviously affected porous materials before any deodorizing.
How Revive 360 Renovations handles the insurance conversation
The claim process is its own project. Revive 360 Renovations documents materials by type and quantity, not just by room, because adjusters write estimates by line items. Rather than listing “kitchen cabinets,” we note linear feet, box construction, door style, finish, and hardware type. For countertops, photographs plus descriptions of thickness and edge profile help the adjuster price apples to apples if replacement is warranted. When homeowners ask about pivoting to different materials during rebuild, such as moving from laminate to quartz or to a modern alternative like Thinscape, we explain the difference between like-kind coverage and upgrade choices. That clarity avoids surprises.
We also emphasize code upgrades. Older homes often require electrical work during rebuilds. GFCI and AFCI protection, hardwired interconnected smoke alarms, and modern venting standards may not have existed when the home was built. Insurance typically covers code-required upgrades when they apply to repairing a covered loss. Properly documenting which upgrades are triggered by scope protects both the homeowner and the project schedule.
Kitchens after a fire - practical design choices
Fire in a kitchen pushes you into design decisions that you had planned to make someday. Use the moment wisely. Ventilation matters. Strong capture at the cooktop, ducted to the exterior, reduces future odor build-up and grease fires. If layout changes are on the table, think about traffic lines. Even in small spaces, a galley layout with the right clearances or a modest island can improve function. Modern kitchen design ideas for small spaces often translate well in rebuilds, where walls are already open.
Cabinet color influences resale value, and if you are replacing doors or boxes, this is the time to consider the best cabinet colors for resale in your market. Hardware choices affect both look and ergonomics. A thoughtful mix of drawers and pullouts maximizes storage in a small Chicago kitchen or any compact space. Lighting layers matter more than a single bright fixture. Under-cabinet task lights, recessed cans on dimmers, and a simple pendant plan transform the room and help you forget the fire happened.
Bathrooms, bedrooms, and beyond
Smoke respects no room boundaries. Bedrooms down the hall may need sealing and repainting even when walls look fine to the eye. In bathrooms, remember moisture-resistant materials when you rebuild. Cement backer in wet zones, properly detailed shower pans, and good bathroom ventilation prevent the next problem. If a laundry room was affected, inspect dryer ducts. Lint and smoke residue create a sticky combination that benefits from replacement. On floors, tile options for high-traffic areas perform well where cleaning frequency increases after a fire.
Quality control before the last coat of paint
Before signing off on a restoration, do a warming test. On a sunny day, let the interior heat naturally or gently raise the HVAC set point. Walk the spaces and sniff at outlets, baseboard tops, and inside cabinet boxes. Odors that were not apparent at 65 degrees can show up at 75. Open and close doors and drawers. Check airflow at supply registers and returns to confirm no lingering soot dust sits in ducts. Wipe a white cloth along tops of door casings and picture rails. It should come back clean. If not, a secondary cleaning cycle is warranted in those areas.
Lessons learned from tricky projects
Protein smoke from a slow-cooking stove incident that never produced visible flames can be harder to remove than robust soot from a larger fire. The residue bonds to paint, and many homeowners do not realize anything is wrong until a pet brushes against a wall and comes away with a smell. In those cases, a full-house clean and seal, including kitchen cabinet interiors and even closet shelving, may be necessary.
Another surprise comes from soot that traveled into an attic through air leaks in recessed lights. The living space looked fine, but the odor would not go away. The solution was to air seal the penetrations during rebuild, remove contaminated insulation around the cans, and seal the attic side of the drywall before reinstalling new insulation. It was not the most obvious line item on day one, but it made the difference.
When Revive 360 Renovations recommends replacement over repair
We prefer to save what makes sense. Still, we draw lines. Smoke-exposed infant furniture, porous sound-absorbing panels, and heavily charred framing members past structural limits go. MDF baseboards with swollen edges rarely look right after sanding. Vinyl windows that warped from heat never seal properly again. In kitchens, if a cabinet’s particleboard bottom absorbed water and split at the fasteners, it will fail under weight later. We tell clients that some materials are designed to be affordable, not immortal, and a fire exposes those limits. That guidance, delivered early, helps families make peace with replacement where needed and focus energy on the parts of the home that benefit from careful restoration.
Maintenance after restoration
Once the work is complete, simple habits keep the home fresh. Replace HVAC filters more frequently for the first months. Deep clean range hoods and check duct connections annually. Keep a small stash of matching touch-up paint, because sealed walls touch up differently than unsealed. Consider a whole-house maintenance checklist to catch small issues before they become large. If new hardwood has been installed or refinished, follow care guidance for the first 30 days and avoid wet mopping. Small disciplined acts prevent avoidable callbacks and protect your investment.
A brief step-by-step path you can reference
- Stabilize, document, and isolate the affected areas. Extract water, set initial drying, and protect finishes and metals. Identify residue types, then remove char and contaminated porous materials. Clean surfaces methodically, then deploy targeted odor treatments and sealers. Verify dry standards, then move into measured, code-compliant rebuild.
Fire and smoke damage restoration is not guesswork. Done well, it reads like a quiet choreography where each step supports the next. Homes come back from bad mornings. With the right sequence, skilled hands, and honest decisions about what to save or replace, they come back without the smell, without the reminders, and often with small improvements that make living in them easier than before. Revive 360 Renovations approaches each project with that goal, because a house should not feel like a museum to a difficult day. It should feel like home.